
Setting up AWS S3 and CloudFront for Jekyll, Part 2
In our last blog post on setting up Docker for developing and maintaining a Jekyll blog, we didn’t touch on deployment. So for this post, we’re going to deal with deploying our static site using AWS S3 & CloudFront, Route53, and Lambda@Edge.
AWS Simple Storage Service (S3)
AWS S3 is one of Amazon’s oldest web services. It’s pretty straightforward, hence the name. It’s a simple object storage. Allows you to store arbitrary files, including all of our static files used in our website.
AWS CloudFront
CloudFront is Amazon’s global content delivery network (CDN). The main reason we’re using CloudFront in conjunction with S3 is that it allows us to use the free TLS certificate provided by Amazon for HTTPS support.
Lambda@Edge
This isn’t exactly the same as AWS Lambda, instead, this is a feature of CloudFront that leverages Lambda. We’re going to use this to “rewrite” the standard functionality of CloudFront to mimic a traditional web server for static site hosting. The feature we need to mimic from traditional web servers like Nginx is the ability to set a default index file. So when we view example.com/folder1/ it requests example.com/folder1/index.html.
Route 53
Amazon’s DNS will be used to route traffic to our CloudFront distribution.
Intro
There are several ways to set up S3 with CloudFront for static site hosting. Using S3 by itself for static file hosting can be a bit peculiar. Using four separate services to run a simple static site may seem like overkill, but as you’ll see it’s not much configuration and all four services are designed to be used together.
S3 Setup
Create a bucket with the same name as your site’s domain. If your domain name is example.net, then the bucket name should be example.net. If it’s blog.example.net, then the bucket should be blog.example.net.
Use the default settings, including blocking all public access. Our S3 bucket will NOT be public, it will only allow access via CloudFront.
Static website hosting
We will enable static website hosting, and configure our index document.
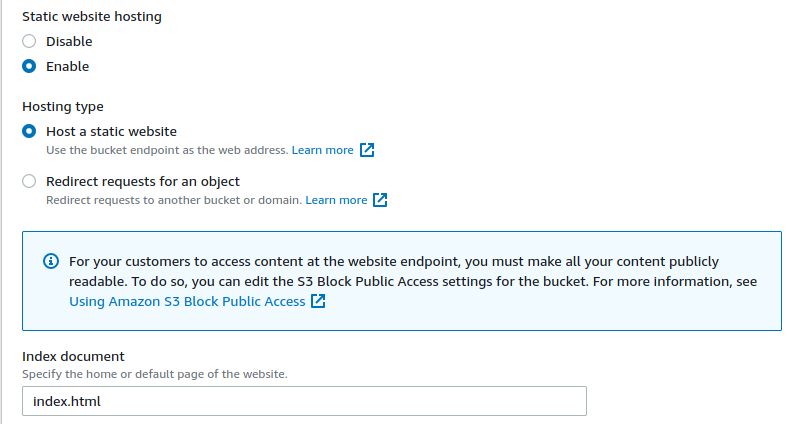
This is all we need to do, for now for S3.
Route 53
Create a public hosted zone for your domain name, if you haven’t already.
We’ll come back to Route 53 when it’s time to point our domain to our CloudFront distribution
Create a CloudFront Distribution
CloudFront will be our frontward facing service. You need to create a distribution and Origin Access Identity (OAI) for access S3. Most of the settings will be left to their default configs.
Origin domain
Pick the S3 bucket we created. Once you select the S3 bucket, a new option will appear for options in regards to OAI.
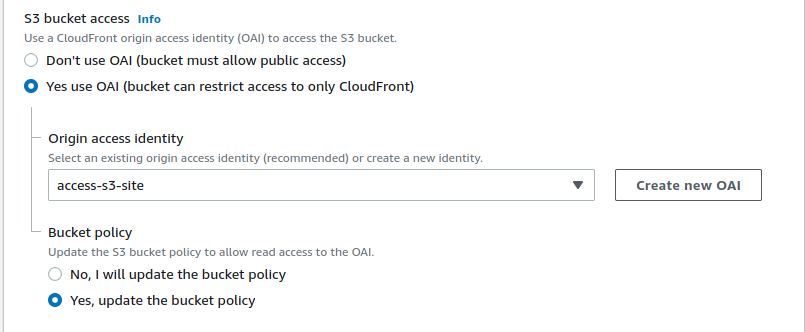
Origin Access Identity (OAI)
Since our S3 bucket blocks all public access, we need to tell S3 to allow our CloudFront distribution to access the bucket. Create a new OAI with a name that allows you to easily identify what it does. Tell CloudFront to update the S3’s bucket policy for us so we don’t have to manually do it.
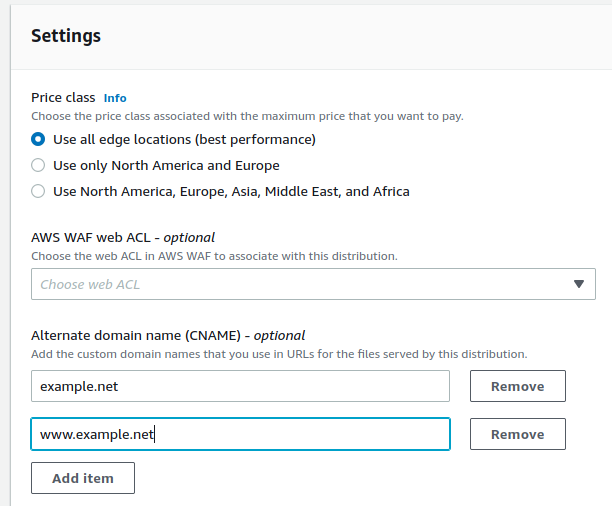
Alternate domain name (CNAME)
Enter the domain(s) you plan to use based on the bucket name. If the bucket name is example.net:
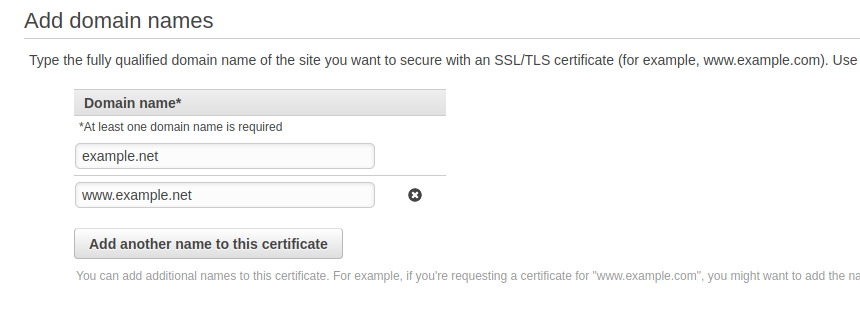
Custom SSL certificate
Click on `Request Certificate, this will open a new tab in your web browser where you will add domain names to the certificate. Use the Cnames you entered previously.
Choose DNS Validation since Route 53 is hosting our domain. Create the request.
Validation
Since Route 53 is hosting our domain, we can simply hit Create record in Route 53 for both domains and it will create the appropriate record to allow us to validate our domain so Amazon can issue us a certificate.
Head back to the page you were on when creating the CloudFront distribution. Refresh the certificate options, and select our newly created certificate.
Finishing Up
Set Default root object to index.html.
Click on Create distribution, it may take a few minutes to propagate. Make note of the random Domain name that CloudFront generates for the distribution. We will need to know this to set up the DNS records.
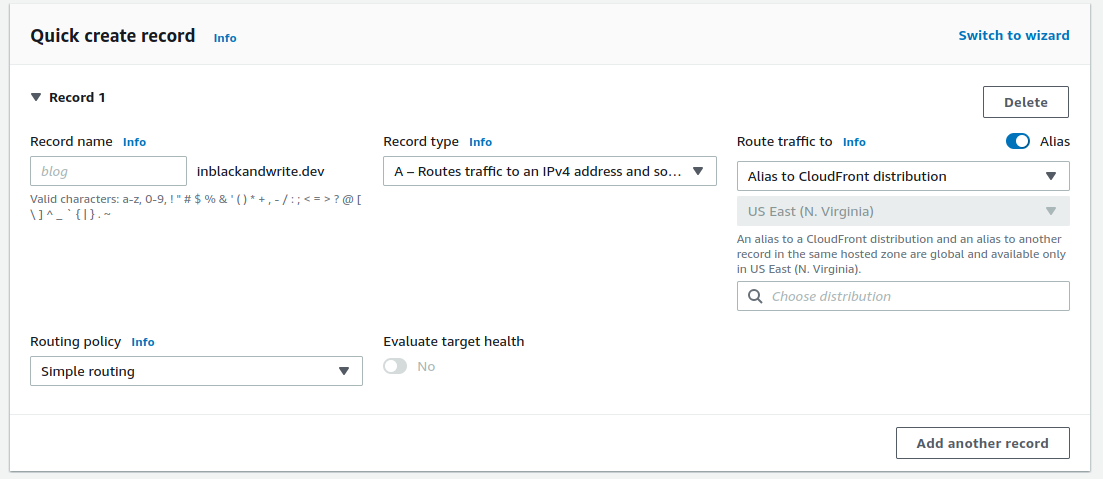
Back to Route 53
Create (or edit) the root A name with a Simple routing policy. Select Alias to CloudFront distribution and pick the CloudFront distribution we just created.
You may or may not need to create a CNAME so we can access the site via www.example.net
Lambda@Edge Config
Lastly, we should setup Lambda@Edge to allow us to use our index.html. Not all locations allow Amazon CloudFront Origins using Lambda@Edge, so keep that in mind if you can’t add a trigger in the next step. us-east-1 is an acceptance location.
Create a Function from scratch using the Node.js 12.x runtime. It could work with newer versions, but I haven’t tested it yet. Make sure Create a new role with basic Lambda permissions is selected for the Execution role.
Hit Create Function and move to the next page.
Trigger
This is the main Lambda page. Hit Add Trigger. Configure the trigger by selecting CloudFront.
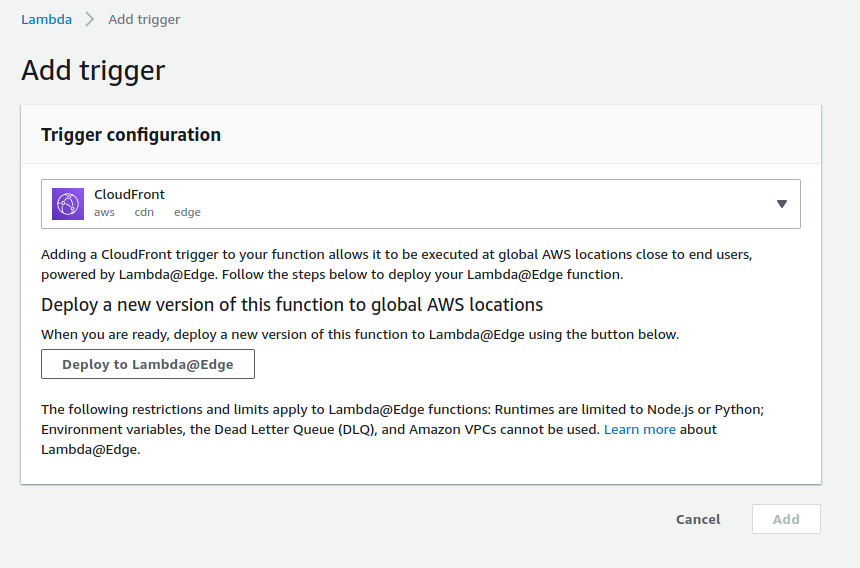
Click on Deploy to Lambda@Edge and a popup will appear.
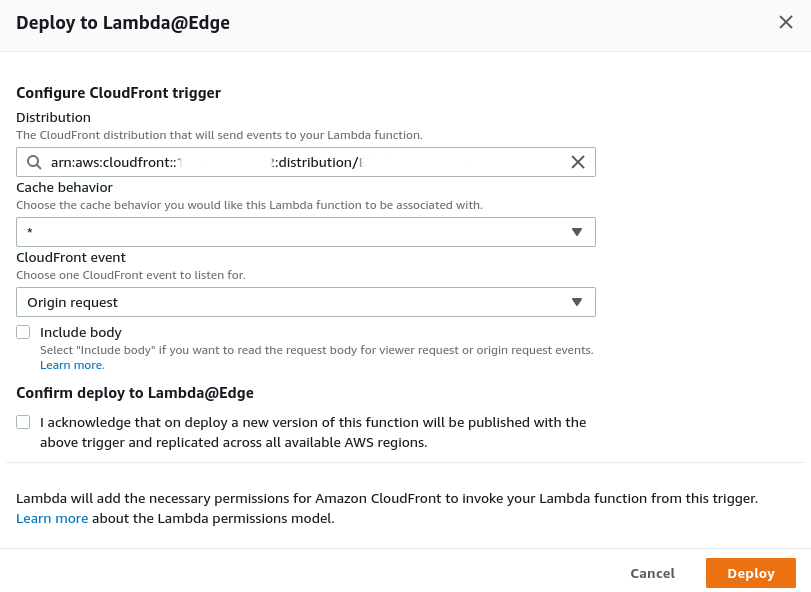
Select the Distribution ID of the CloudFront distribution we created for our site. Leave Cache behavior as the wildcard, and CloudFront event as Origin request. Origin request has our Lambda function execute before CloudFront forwards the request to the origin, which is S3 in this particular case. Click Deploy.
The Code:
The following code will allow requests to example.net/folder1/ to example.net/folder1/index.html. This should be copy and pasted to replace any default code source for the function.
'use strict';
exports.handler = (event, context, callback) => {

    // Extract the request from the CloudFront event that is sent to Lambda@Edge
    var request = event.Records[0].cf.request;

    // Extract the URI from the request
    var olduri = request.uri;

    // Match any '/' that occurs at the end of a URI. Replace it with a default index
    var newuri = olduri.replace(/\/$/, '\/index.html');

    // Log the URI as received by CloudFront and the new URI to be used to fetch from origin
    console.log("Old URI: " + olduri);
    console.log("New URI: " + newuri);

    // Replace the received URI with the URI that includes the index page
    request.uri = newuri;

    // Return to CloudFront
    return callback(null, request);
};
Permissions
The permissions should have been created for us by default. If not, the code is as follows
{
    "Version": "2012-10-17",
    "Statement": [
        {
            "Effect": "Allow",
            "Action": [
                "logs:CreateLogGroup",
                "logs:CreateLogStream",
                "logs:PutLogEvents"
            ],
            "Resource": [
                "arn:aws:logs:*:*:*"
            ]
        }
    ]
}
This gives the function the ability to write logs to a CloudWatch log group.
Conclusion
With everything set up, you should be able to push your Jekyll blog to S3 and access it as you would on a traditional web server.
Error Pages
You may want to tell CloudFront where your custom error pages are at to avoid showing the standard CloudFront error pages when visitors access an incorrect URL.
