Why BSD?
ZFS
FreeBSD’s default filesystem is ZFS. This means ZFS on FreeBSD is baked right in and well documented. ZFS has been the best thing to happen for system administrators since containers. ZFS isn’t just a filesystem, it’s also a volume manager and elimiates the need for things like LVM (and as you’ll soon see, the need for seperate software RAID).
Jails
Thick Jails in BSD predate Docker containers, and jail management built right into the kernel. Even though you can manage jails without any extra software, we’re going to use a dedicated jail manager tool to make life simiplier. Jails can give you the flexibility of docker/podman containers with less overhead.
Jails can also run versions older than the hosts. For example, your host can be FreeBSD 14.0, while you can leave some jails on older, FreeBSD 13.
Ports and Pkg
In FreeBSD land, the “base” packages are managed seperately from user-installed packages. freebsd-update fetch install && pkg update && pkg upgrade respectively. I think this makes for an easier to manage server system where you have more control over software updates.
You can also downgrade, so if you upgrade to a new FreeBSD major or minor release, and find something doesn’t work correctly, you can revert back to the previous version.
Goals
Software
Plex
The reason I started building this server in the first place was to have a semi-dedicated place to store and stream my digital media. So most of the design choices revovled around utilizing Plex. Some people have had a fallen out with Plex as they are moving to become more of a Netflix-style platform integrating with self-hosted media.
Plex is the only self-hosted media solution that officially supports FreeBSD. Jellyfin exists, but there is no official Jellyfin support, and at the time of me building this server Jellyfin had mixed reviews on reliability.
Nextcloud
Nextcloud had been around for ages and is very mature as a self-hosted content platform. Was an obvious choice.
Gogs
I wanted to have my local Git repo be my main repo for private projects and Yadm dotfiles storage. Gogs offers a nice and simple web UI that’s easy to install and maintain.
Hardware
CPU
This is actually a debated issue for the simple fact that ECC RAM is specifically useful for ZFS pools. But the consumer Intel chips do not have any motherboards that support ECC RAM. You’d have to go with either a server or workstation chasis and motherboards, which will increase the cost several hundred dollars. While AMD has consumer-grade motherboards that support ECC.
When designing my system, Plex supported FreeBSD Intel Hardware Transcoding. However, as of May 2023, Plex has removed Intel hardware transcoding. This means you will have to setup a Docker Container running Linux, or wait for the two Pull requests to be merged to bring back native FreeBSD support. With that said, had I known about this before designing my system, I may have went with AMD to run ECC RAM.
There’s nothing special about ZFS that requires/encourages the use of ECC RAM more so than any other filesystem. Since ECC-RAM
is not a hard requirement, I went with:
RAM
- Crucial Pro 32GB (2 x 16GB) DDR4 3200
Room to upgrade to 64GB in the future
MOBO
- ASRock Z690 Pro RS LGA 1700
I wanted something with enough M.2 slots to run two in a mirrored vdev without taking away lanes with a SATA port. This one has 3x M.2 slots, but the 2nd middle slot if used will disable one of the onboard SATA ports. This is fine for me as I do not intend on using all three.
6x SATA ports is fine to start, you can upgrade with an PCI-E 3.0 HBA to add more drives later.
Every other feature is standard and not something you have to go out of your way to look for.
Storage
The bulk of my money was spent on HDDs and SDDs.
Boot/OS
- 2x 1TB NVMe SSD PCIE link
Running in a mirrored vdev so the total usable space will be ~1TB. Enough to run the OS and user-installed packages without worrying about disk space.
Jail Storage
I wanted all of the Jails running on seperate pools and seperate physical disks than the OS.
Mirroed vdev pool so total space will be 1TB. Though I don’t expect much actual storage needed by jails, in hindsight I probably should have opted for double the space just to be on the safe side.
NAS Storage
Most of the storage is packed into large HDDs to hold the actual video media files. I wanted to maximize physical bay space by picking relatively large drivers (14TB+) and cheap price per TB. I researched a popular HDD seller that sold factory recertified disk drives. I felt confident given the track record, and the fact that the majority of the video files can be recovered from remote sources and the setup with ZFS will add redundancy and error checking.
- 4x 16TB Seagate EXOS X16 HDDs
2 seperate mirrored vdevs equals 32TB of total usable space.
FreeBSD Install
The FreeBSD Handbook has details on installing in Chapter 2. Complete with screenshots and important notes. However, if you’ve installed Linux before, it’s not much different.
I use a simple USB drive to install operating systems these days. So I downloaded the FreeBSD-14.0-RELEASE-amd64-memstick.img.xz which can be found in the ISO Images download site.
Using Etcher I flashed it to the USB drive. But of course you can just use any other method.
UEFI setup
Before I install, I like to disable SecureBoot since this system will not have windows installed, and FreeBSD does not support SecureBoot.
Components
The key being that it defaults to selecting debugging packages, which you likely won’t need for such a system. These are the Components I installed, but remember, these can always be installed or removed later, so it’s not that big a deal.
Partitioning
Using guided root-on-ZFS is the simplest route. For Install, select the two boot drives, in my case the two NVMe devices.
- Pool Type: mirrored
- Pool Name: zroot (can be any arbitrary)
- Force 4k Sectors: Yes
- Encrypt Disks: No (I will be encrypting drives I use for Jails that store actual data, and won’t be using geli)
- Partition Scheme: GPT (UEFI)
- Swap Size: 16g, this setting is always debated. Old wisdom, even mentioned in the FreeBSD handbook says to use double the amount of RAM. However, this rule of thumb existed before systems came with as much RAM as they do now.
- Mirror Swap: No
- Encrypt Swap: No
Network Installation
The NIC on my Motherboard is a Dragon RTL8125BG, which is just Realtek RTL8125BG chipset. The install did not recongnize my network card, so I had to skip the network setup portion of my install. This means out of the box the machine won’t have LAN/WAN connectivity. I will show you how to install the drivers and configure networking at the end of this article. But for now just skip the network setup, and make sure you to keep your keyboard and monitor handy.
System Config
I selected:
- sshd
- ntpd
- ntpd_sync_on_start
- dumpdev
System Hardening
I skipped this section as I will configure this manually later, after the install.
Add Users
By default there is just a root account. I like to use sudo with a regular account. So you can create that account here now, or later.
Remaining Install
The rest of the install should be self-explanatory.
Network Interface Card (NIC) driver install
Since the installer did not reconginze my NIC, I had to manually install the drivers. This takes a bit of work, as you have to get the driver on the system in the first place.
Spare USB drive
You can use any USB drive formatted in FAT32.
Packages Required
You will need the following two packages
- Realtek-re-kmod Kernel driver for Realtek PCIe Ethernet Controllers (found here)
- pkg - Package manager (found here)
Pkg is the package management tool FreeBSD uses to install binary packages. It wasn’t installed in my case during the OS installation, and we’re going to use it to get the Realtek kernel driver installed.
Prepare USB
Copy over the pkg files to a USB drive formatted in FAT32 and plug it into our FreeBSD machine.
Mount Drive
When you insert the USB drive it won’t mount automatically. But you should see it in /dev folder.
ls /dev/da* should show /dev/da0s1 listed after you insert the USB drive, which you can then mount.
[~/]$ mkdir /media/usb
[~/]$ mount_msdosfs /dev/da0s1 /media/usb
Move the two .pkg files you place on the drive to any folder on the host. cp /media/usb/* /tmp/
Install Packages
The files are really XZ compressed TAR file (.txz) files. You’ll need to decompress the pkg package in order to bootstrap the package management in order to install the drivers.
The pkg-VERSION.pkg file has a full path to a binary called pkg-static, which you will use to install itself. Then install the realtek drivers.
[/tmp]$ tar xf pkg-VERSION.pkg
[/tmp]$ usr/local/sbin/pkg-static add pkg-VERSION.pkg
[/tmp]$ pkg add realtek-re-kmod-VERSION.pkg
After the driver is installed. We simply have to add a line to the /etc/rc.conf file
After that you can restart networking, manually bring up the interface or restart the server.
Manually bring up interface
Configuring a simple dynamic IP address to get it started, which can be setup with static later.
Next Steps
With the system setup, we can start adding ZFS pools for both Jail and Media storage. I’ll go over this in Part 2 of this series.
]]>

 This plugin provides two important features that will make your workflow at the command line much easier.

 This time you’re greeted with the most likely command based upon previous commands you’ve entered. Again, we have a much smarter and more intuitive system. I can’t do the full feature set justice in one post so you should check out the zsh-completion page.
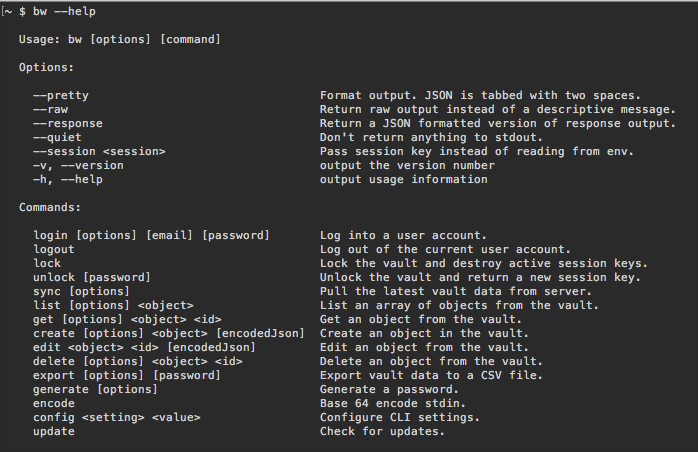
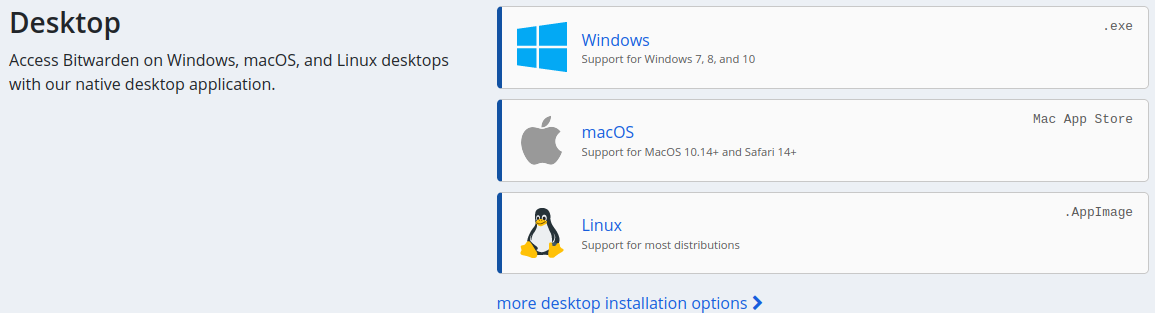 There’s a standalone application that runs on Windows, OS X, and Linux (via AppImage). The bulk of your time will likely be with the Android and iOS apps. There are also command-line tools in addition to a web vault.